For iPhone X-12 Pro Max Face ID Repair- Why not Choose i2C FA02 Face Integrated Chip
There are a lot of repair kits and chips out there. Cell phone surface failure is one of the most common cases in cell phone maintenance. I recommend an integrated facial chip like the i2C FA02.
I2C FA02 Face Integrated Chip is commonly used in iPhone X/XS/XS MAX/XR/11/11Pro/11 Pro Max/12/12 mini/12 Pro/12 Pro Max/iPad Pro 3/4 Face ID repair. the integrated chip with A1 pin and tin ball, and there is no need to convert gasket, capacitor and MOS tube, which makes iPhone Face ID repair easy and efficient.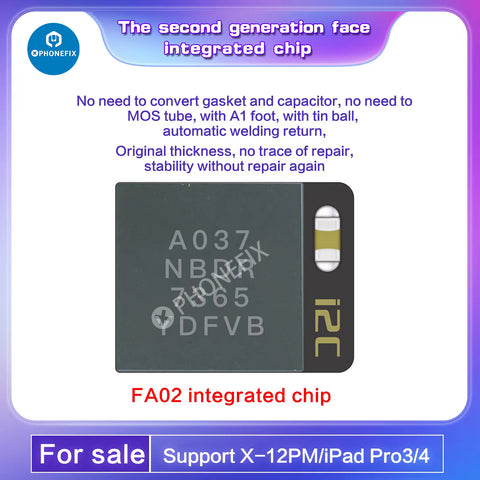 How to use:
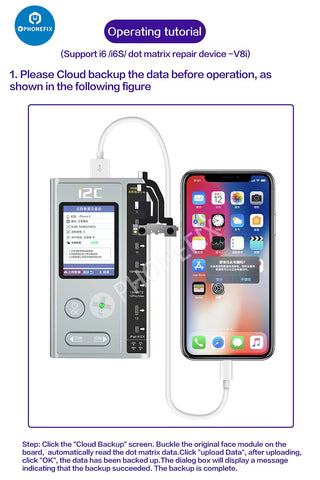
1. Don't forget to back up the data with i2C i6S Programmer before operation.
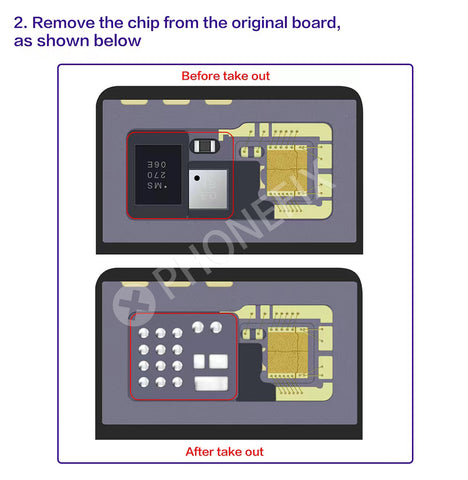
 2. You need to remove the chip from the original board.
 3. Welding I2C FA02 integrated chip to the small plate.
 4.
After welding, please connect the iPhone to the I2C programmer via
cable for testing and burning data that has been backed up.
4.
After welding, please connect the iPhone to the I2C programmer via
cable for testing and burning data that has been backed up.
 Remove
the welded line, buckle it on the dot matrix board and click “Test”,
check whether the data is normal, then click “Burn”, after burning,
perform the installation test.
Remove
the welded line, buckle it on the dot matrix board and click “Test”,
check whether the data is normal, then click “Burn”, after burning,
perform the installation test.
Now, you have replaced your dot matrix IC successfully.
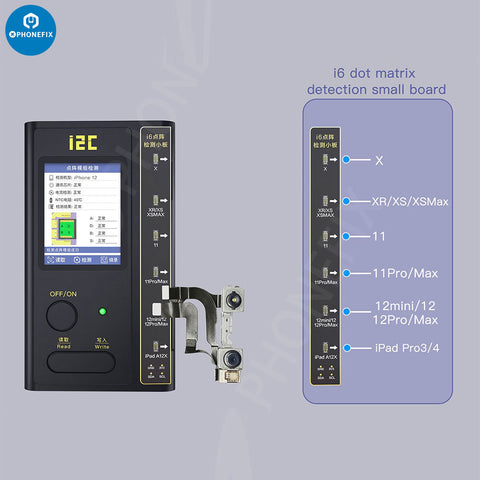
The i6 programmer mentioned above is also a great for iPhone X-12ProMax Face ID repair, such as dot matrix data detection, reading, burning.
How to:
 (3) Button dot matrix module and connect mobile phone Module data query, cloud backup dot matrix data, burning operation.

I2C FA02 Face Integrated Chip is commonly used in iPhone X/XS/XS MAX/XR/11/11Pro/11 Pro Max/12/12 mini/12 Pro/12 Pro Max/iPad Pro 3/4 Face ID repair. the integrated chip with A1 pin and tin ball, and there is no need to convert gasket, capacitor and MOS tube, which makes iPhone Face ID repair easy and efficient.
1. Don't forget to back up the data with i2C i6S Programmer before operation.
4.
After welding, please connect the iPhone to the I2C programmer via
cable for testing and burning data that has been backed up.Remove
the welded line, buckle it on the dot matrix board and click “Test”,
check whether the data is normal, then click “Burn”, after burning,
perform the installation test.Now, you have replaced your dot matrix IC successfully.
The i6 programmer mentioned above is also a great for iPhone X-12ProMax Face ID repair, such as dot matrix data detection, reading, burning.
How to:
(1) Connected to the mobile phone can support face module data query, Cloud backup dot matrix data,never lost.
(2) Buckle the lattice module It can detect, read and burn lattice data.


Comments
Post a Comment