How to Use KM002C USB-C Tester
We will show how to use KM002C USB-C Tester in the article, from 4 points-Create a new record, Dash Board, Real-time Curve, Application.
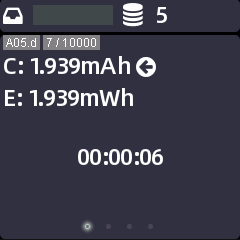
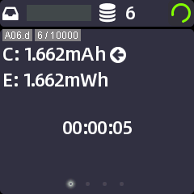
1. Create a new record
Press the “confirm” button and select “ok”
You can go to “setting” (Long press “confirm”) to modify the save interval.


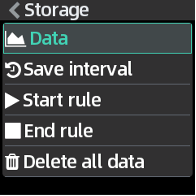
(2) Auto start and stop by setting trigger conditions
Auto start: Setting > Storage > Start rule > Set current (Manual means no rules)
Auto stop: Setting > Storage > End rule > Set current (Manual means no rules)
Save interval: You can set it according to your needs, but each record is limited to 10,000 pieces of data.


Connecting to PC software to read the records.

2. Dash Board
Here is the dashboard. You can view the real-time voltage, current and wattage at a glance. Press the “confirm” button to adjust the speed (4/15/60 Hz).


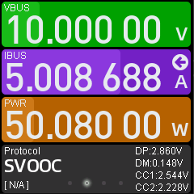
Green block represents the voltage, marked as VBUS.
Purple block represents the current, marked as IBUS.
Orange block represents the power (wattage), marked as PWR.
Black block represents the possible fast charging protocol while the DP, DM, CC1, CC2 are on the right. (The protocol may not 100% accurate).
Relationship Between Voltage and Protocol Based on D+/D-
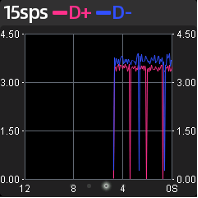
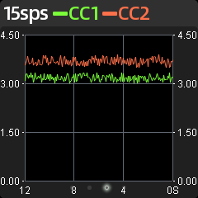
3. Real-time Curve
You can observe real-time data curve in here. Press the “Confirm” button to switch between VBUS/IBUS, D+/D-, CC1/CC2.

4. Application
(1) Charging protocol
Please do the following preparations before using it.
1. Please connect the tester to a sustainable power supply via HID port.
2. Please insert the USB-C Male (Plug) to chargers when you’re testing the PD power supply
3. Please disconnect any devices connected to the USB-C receptacle before using this function. No matter what's burned, you are responsible for it.

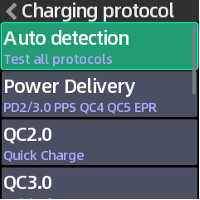

Auto detection
How to use: Application > Charging protocol > Auto detection

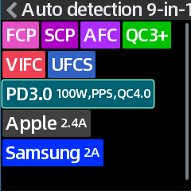
Supported protocols: PD2.0 / PD2.0 PPS / PD3.1(EPR) / QC2.0 / QC3.0 / QC3+ / QC4+ / QC5 / AFC / FCP / SCP / VIFC / UFCS / APPLE2.4A / SAMSUNG
Unsupported protocols: VOOC / MTK PE / SFCP
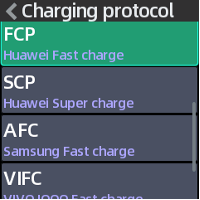
Single protocol detection/trigger
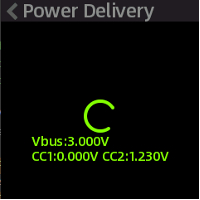
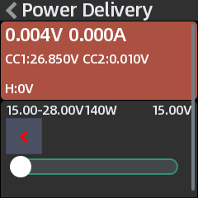
How to use: Application > Charging protocol > Power Delivery
Step 1: Connect the power supply to HID port.
Step 2: Insert the USB-C Male (Plug) of tester into the chargers.
1.There’s no need to insert the cable into USB-C female (Receptacle), because the tester can simulate a 50V/5A cable.
2. The cable simulation is not perfect. If it doesn’t work, please disconnect the USB-C Male (Plug) from charger and insert a cable with 5A E-Marker chip to the USB-C female (Receptacle).
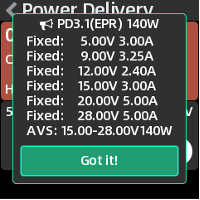
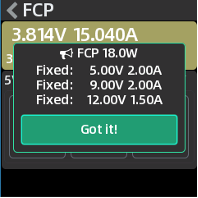
Step 3: Show supported PD information (Figure 2) and press “Got it!”
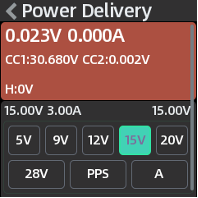
Step 4: Use “left” and “right” to modify the value and press “confirm“ to tigger the corresponding voltage or current.
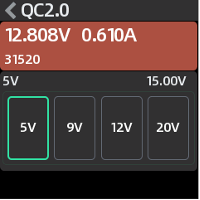
It’ll be the same to trigger other protocols (Figure 5-8).
Step 5: If you need to test the power supply with USB-A port, please insert the cable to the USB-C female (Receptacle). No need to use USB-C Male (Plug).


Supported protocols: PD2.0 / PPS / EPR / QC2.0 / QC3.0 / AFC / FCP / SCP / VIFC / UFCS / VOOC
The original cable and a small load are required to trigger the VOOC/SVOOC protocol
Unsupported protocols: MTK PE / SFCP
Supplementary Instructions of PD protocol
This tester is designed to test the PD protocol, so please read this chapter carefully.
The PD protocol is a brand-new power transmission solution released by the USB-IF in recent years, which has great differences with the traditional fast charging protocols.
1. The PD protocol was based and rely on the brand-new USB-C port. Those old ports cannot be compatible with the PD protocol.
2. There’s a new feature of standard USB-C. It’ll keep 0V instead of 5V when the it’s not working. A status signal must be given to activate 5V. This feature is different from the USB-A port, but is a bit like the OTG of mobile phone. Therefore, the tester won’t light up when plugged into the charger, and it’s also the reason why the power supply is needed when triggering the fast charging protocol.
(2) Modules
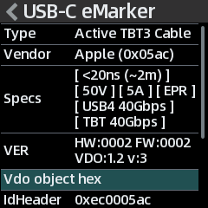
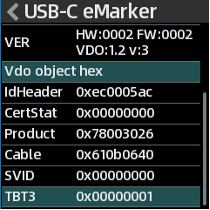
USB-C eMarker
How to use: Application>Modules>USB-C eMarker
It read the info of USB-C eMarker and can support 3A / 5A / 50V / EPR / TBT3 / TBT4 cable.
The EPR means it can support the latest PD3.1 protocol. You must use this kind of cable when the power of PD protocol exceeds 20V/100W.
Apple Charger
How to use: Application>Modules>Apple Charger
It read the info of Apple charger. You can use it to tell the difference between genuine and fake Apple chargers.

Extended tools (In development)
How to use: Application>Modules>Extended tools
Read information of MFI cable
Application>Modules>Extended tools>MFI cable
Internal resistance test of cable
Application>Modules>Extended tools>Internal resistance
(3) Settings
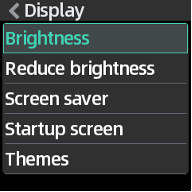
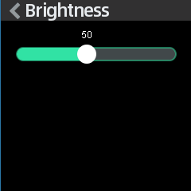
Settings>Display
Brightness: adjust the brightness
Reduce brightness: the brightness will be reduces after a period of no operation.
Screen saver: the power information will be shown in large fonts after a period of no operation. (In development)
Startup screen: It’ll display the “POWER-Z” for a period of time at startup. The text/image can be customized by customers.
Themes: In development

Settings>Storage
Manage stored data and set some auto-run rules
Data: the usage of each group of data, and can be read by the PC software
Save interval: The recording interval can be set from 1 to 120 seconds, and each group of data is limited to 10,000 pieces.
If you need to record every 5 seconds, you can save about 13 hours of data.
Start rule: disabled by default, it can automatically to start the recording by setting a value.
End rule: disabled by default, it can automatically to stop the recording by setting a value It’s very suitable to monitor the charging curve of mobile phone.
Delete all data: Delete all recorded data and can also be managed on PC software.


Settings>Language
You can switch between English and Chinese

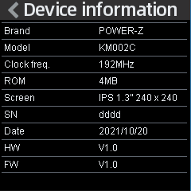
Settings>About
Device Information: View device information, firmware version, SN, etc.
User manual: Scan to get this manual


Settings>Reset all settings
Restore to the factory settings, the file system will be formatted, and all data will be lost.

The user manual of the computer software is different from the tester, so please stay tuned.


Comments
Post a Comment