iPhone X Face ID Not Working Move iPhone a Little Lower
iPhone X-12 Faces can malfunction due to hardware or software problems and it also prone to Face ID failure once it has been water
damaged or dropped. This guide explains why your phone shows Face ID not
working move iPhone a little lower/ higher and how it can be fixed with
J-Box and V1S.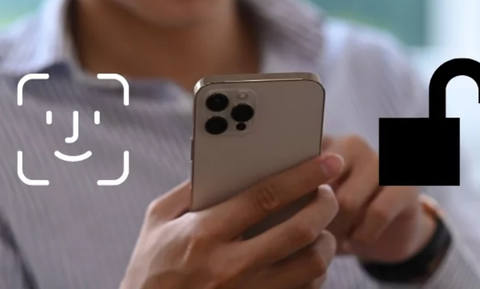
Software Issue
The
message can start popping up because of issues with software or
hardware. Updating the device to the latest version of iOS fixed the
issue for most people, but some devices require a quick solution like a
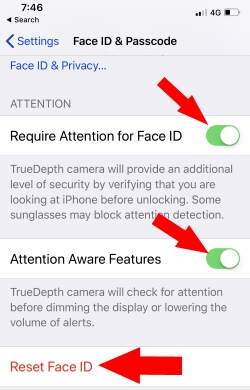
reboot or face ID reset.
To
update iPhone, open the Settings App > General > Software Update.
Before doing that, make sure your iPhone is connected to the Wi-Fi.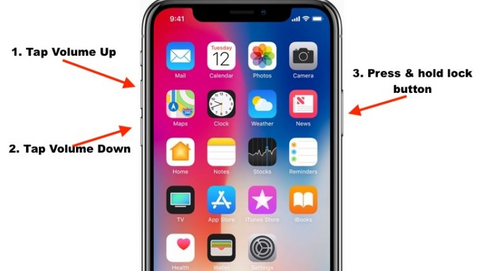
To
restart iPhone with Face ID, press and quickly release the iPhone X Volume Up button, press and quickly release the Volume Down button and then press
and hold the Side button until the Apple logo appears.
Hardware Issue
If
your case is not related to a software issue, the front-facing sensors
like Infrared Camera, Ambient Light Sensor, Dot Projector, or Flood
Illuminator on the iPhone X Earpiece Flex Cable can be behind the message. If one of these three parts fails, it will cause an error.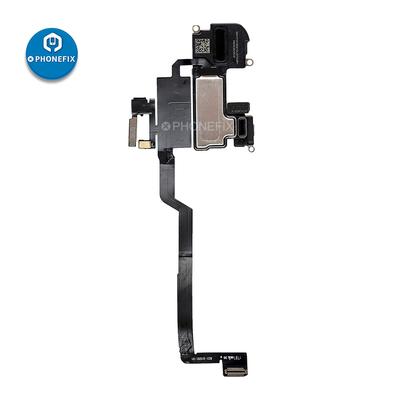
If you have recently replaced the iPhone X screen display
of your iPhone, the issue can be caused by pins that connect the
earpiece to the motherboard, so you need to contact the store that
replaced the screen and ask them to check if the pins are correctly
connected or not.
Hardware Issue Troubleshooting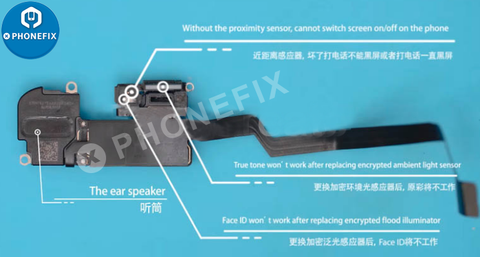
Step 1. Test The Flood Illuminator
There
are two important Face ID parts whose behavior relies on the support of
the Flood Illuminator. In our daily repair work, we can test the
Proximity Sensor and the Ambient Light Sensor to confirm whether the
Flood Illunmunator is working normally.
Cover the top of the
screen with one hand and make a phone call to confirm whether the
Proximity Sensor is working. We can see that the screen turns black
immediately. Judging by this, the Proximity Sensor is working normally.
Next,
test the Ambient Light Sensor. Set the screen brightness to the lowest
and then hold the phone under a bright light. With the screen getting
brighter, we can confirm that the Ambient Light Sensor is also working
normally.
Step 2. Test The Front Camera Parts
Let’s move on to the next step of face id not working - test the iPhone X front camera parts. Open the camera app and swipe to Portrait Mode. The background is not blurred, which is abnormal.
Step 3. Observing The Dot Projector
At
the Portrait Mode, there is no flashing red light from the Dot
Projector. But the Dot Projector should emit flashing red light in
normal status. We can confirm now that the Dot Projector has
malfunctioned. This is the fault that causes the Face ID to set up
failure.
How to fix it?
1. Jailbreak and write the Earpiece Flex Cable data
In the first place, connect the phone to the computer for jailbreaking the iPhone with J-BOX.
Open the software and click “Start”. The phone is in recovery mode
automatically. Put the phone into DFU mode manually. The jailbreaking
has succeeded.
Open the JCID Repair Assistant. Click “Detect” and unlock automatically. Then we use JC V1S to write the data. Connect JC V1S and phone to the computer.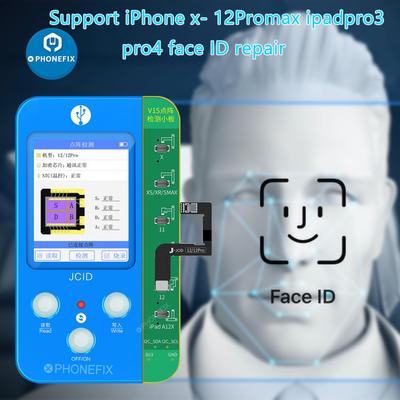
Get
a new JC earpiece flex cable. Attach the earpiece flex cable to JC V1S.
Open the JCID Repair Assistant again. Click “Connect” and start
testing.
Click “Activate FPC”. Bind the flex cable to the phone.
2. Install the new flex cable with written data.
Disassemble
the phone and disconnect the flex cables. Remove the display assembly
and detach the earpiece flex cable. Install the new earpiece flex cable.
3. Test
Connect
the display assembly and assemble the phone. Boot up the phone, and go
to Face ID settings. Face ID is set up normally and unlocks normally.
The fault is cleared.


Comments
Post a Comment