Unlock NAND to Repair iPhone X stuck in Recovery Mode
There are a lot of responsible reasons for your iPhone X being stuck in recovery mode screen. I’ve detailed the way can take to fix iPhone X Display Screen gets stuck in ARecovery mode with JC BOX, on account of NAND fault in this article.

1. Search the main causes
1. Use 3uTools to flash your iPhone X and the progress bar of flashing appears on the phone and the flashing gets stuck at 20%. An error also appears.
11 % with an error and failure to enter recovery mode from DFU indicate that the CPU malfunctions. 13 % with an error means that the connecting port is faulty while 20% with an error always come with a NAND fault.
So it can be preliminarily judged that the NAND fault has caused the problem.
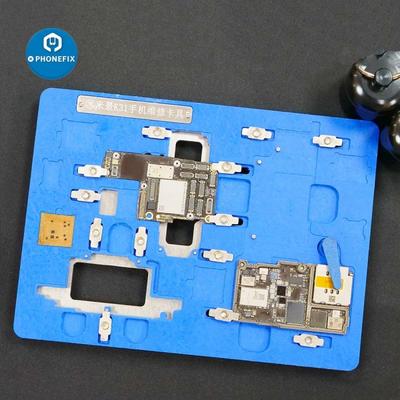
2. Disassemble the Phone X with tweezers and remove motherboard foam. Wrap high-temperature tape around the motherboard and attach the motherboard to the iPhone X Fixture.
3. Heat to remove adhesive around the NAND evenly with Hot Air Gun and remove the NAND with a Pry Blade. Apply some Paste Flux to the bonding pads.
4. Apply some middle-temperature Solder Paste to the bonding pads with Soldering Iron and clean the bonding pads with Solder Wick. Remove residual black adhesive with Hot Air Gun.
5. Clean the bonding pads with PCB Cleaner and apply some Paste Flux. Heat and push the NAND gently with Tweezers after put a new NAND in position. Soldering is complete when the NAND automatically resets.

6. Tear off high-temperature tape, connect the motherboard with a Power Cable and measure the current of the motherboard. The current shows 52 mA, which is normal. Connect the phone with computer to keep flashing.
Now we can confirm the issue is caused by the NAND fault.
2. Repair - unlock the data of the original NAND
1. Turn on the phone for testing. The new NAND doesn't match the WiFi and Bluetooth addresses on the motherboard since WiFi and Bluetooth addresses are stored on the NAND.
2. Jailbreak the phone though JC BOX jailbreak tool. Connect the phone with computer and open 3uTools after jailbreaking. Open the software to read the original data.
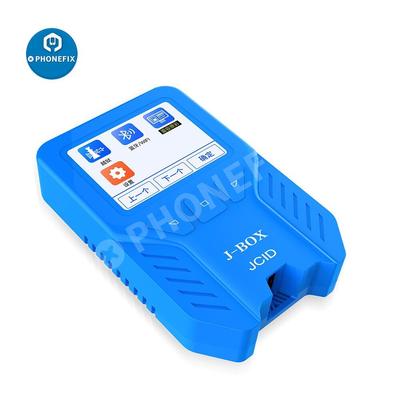
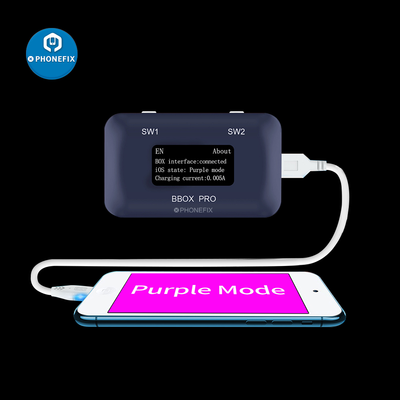
3. Use JC B-BOX to write the data. Connect the phone to JC B-BOX. Get the phone into DFU mode.
4. Open the JC B-BOX software. Click “DFU Mode”. After entering purple mode, the data have been successfully read and written.
The phone turns on normally, WiFi also functions well and the fault has been cleared.


Comments
Post a Comment