Hardware Reason-Why iPhone Front/Back Camera Not Working
There are various reasons for iPhone 12 Front Camera
not Working. Today, we will focus on what to do if the front camera and
the rear camera can not be activated. The flashlight also can not be
activated.
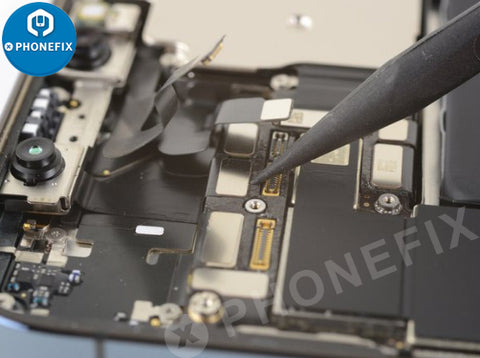
Check the motherboard. Due to improper operation,
components were pried off when an unknown repairman disconnected the
dynamic flex cable. We can see that its adhesive pad has also been pried
off the board.
Open the JC Drawing Diagram Bitmap. The missing component is inductor FL3903 which is the protective inductor on the 1V1 power supply line of the rear camera.

Connect Pin 1 of FL3903 with Pin 1 of C3928 by jumping wire. Remove black adhesive around FL3903 and C3928. Clean with PCB Cleaner afterwards. For better operation when jumping wire, apply some solder paste to the bonding pad with Soldering Iron at 360℃.
Apply Mechanic Flux Paste. Prepare a section of enameled wire with a diameter of 0.02 mm. Use a soldering iron to jumper the two wires around. Then complete the fault left by the engraving cutter head.
Then clean it with some PCB cleaner. Coat some lightning pinch layer on the wire for insulation protection. Then bury the box under the nickel plated lamp for 5 minutes.
Now, assemble the phone and test. Connect the battery with tweezers and press the power button. Tap ‘Camera’ icon and enter into camera mode. The phone turns on normally. The front camera and the rear camera work normally. Fault cleared.


Comments
Post a Comment